How to create tables
Return to the video alternative.
Tables
Create a table
- Under the ‘Insert’ tab, select ‘Table’.
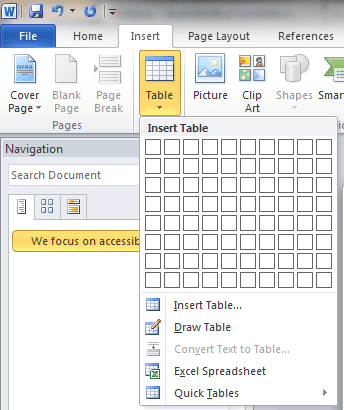
- Select the relevant number of cells.
- Never use the ‘Draw Table’ option.
- Never nest tables within tables.
Format a data table
- Ensure that tables are not nested.
- Select the entire table.
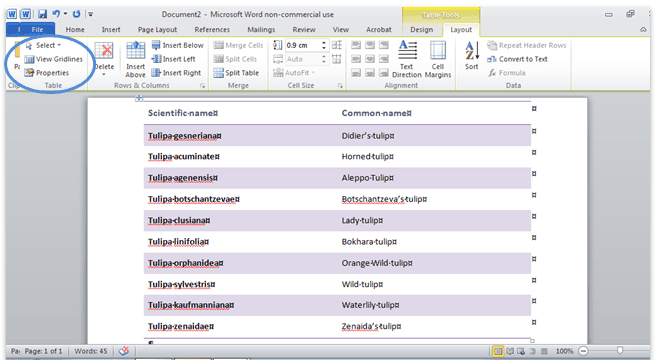
- Right-click on the table or use the ‘Layout’ tab to select the ‘Table Properties’ option.
- Select ‘View Gridlines’. This will show the table borders as a dotted line
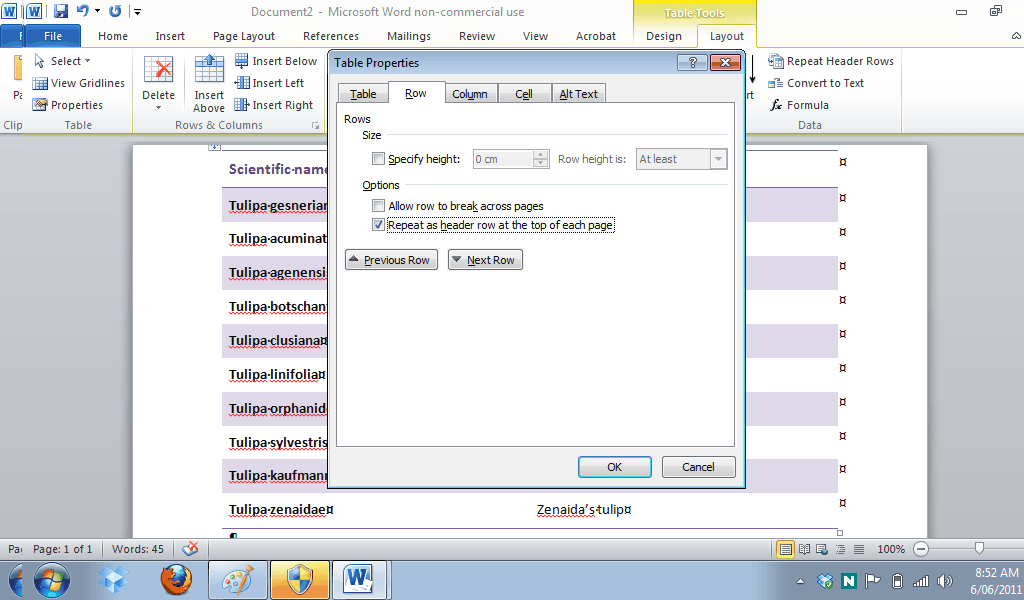
- Turn off the ‘Allow row to break across pages’ option in the row tab of the ‘Table Properties’ dialog box to ensure rows do not break across pages.
- Where a table runs over two or more pages ensure the ‘Repeat as header row at the top of each page’ is enabled.
Format a layout table
- Put your cursor in the table.
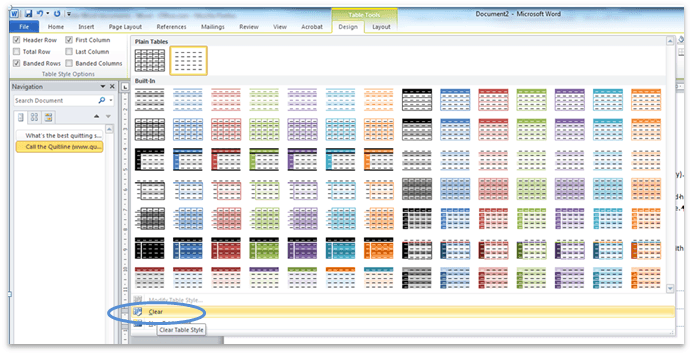
- Under the ‘Table Tools’ section, select the ‘Design’ tab.
- Select the right drop-down arrow in the Table Styles section.

- Select the ‘Clear’ option.
- Ensure the layout table makes sense when linearised by tabbing from cell to cell and checking that the content makes sense and reads as intended.
Borders
- Under the ‘Home’ tab, select the Border option and select the relevant border.
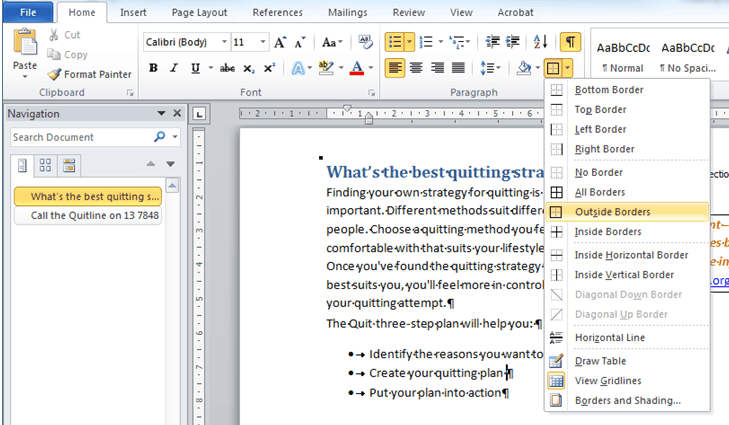
- To modify the colour and weight of the border select ‘Borders and Shading’.
- Do not choose any of the dotted line options, as these are converted to images without alternative text when saving as PDFs.
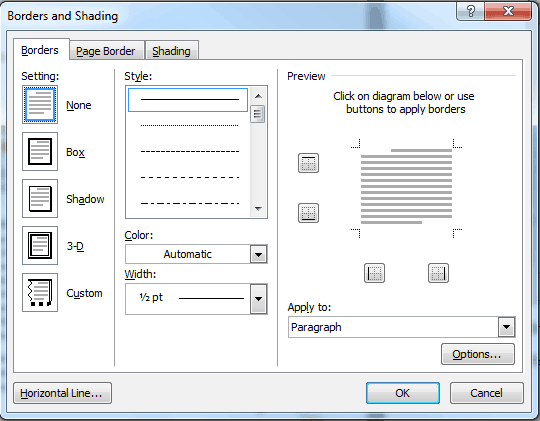
- Under ‘Setting’ select ‘Box’.
- Select a relevant colour from the ‘Color’ option.
- Select a relevant weight from the ‘Width’ option.
- To change the spacing between the border and the text select the ‘Options’ button.
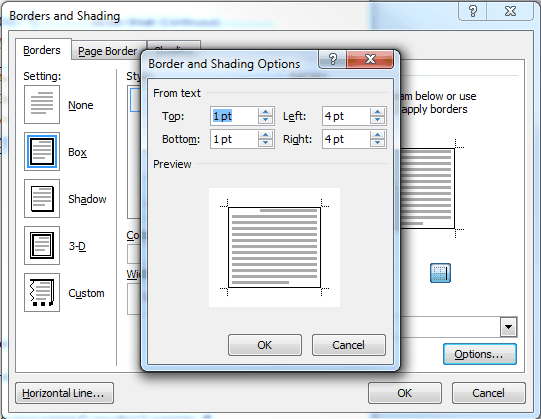
- Change all options (‘Top’, ‘Bottom’, ‘Left’ and ‘Right’) to 14pt.